
Having issues when importing Sony PXW-FS5 4K XAVC to Premiere Pro CS5/CS6/CC? Follow this article to get the best solution.
The Sony FS5 is a radical re-imagining of the FS7 for unsurpassed on the go shooting in the most demanding of conditions. With a body-only weight less than half the FS7 at 0.8kg, you can shoot almost anywhere. Handheld operation is simply exceptional as the superbly balanced chassis is easily configured to shoot from high to low angles thanks to a flexible, rotatable grip and a LCD viewfinder that can be mounted in no less than nine locations. It offers a choice of XAVC or AVCHD codecs. The XAVC codec can be used for 4K and HD recording, while MPEG-2 is limited to HD recording.

Recently, many guys have found it a painful experience when importing and editing Sony PXW-FS5 4K videos in Premiere Pro even Premiere Pro CC. According to the tech support online, the latest version Premiere Pro CS6, CC has the ability to handle 4K files without much problem, but it is extremely hardware intensive owing to the codec issue and resolution. So what’s the available workflow for Sony FS5 and Premiere Pro? Luckily, this problem is easy to solve – all you have to do is convert Sony PXW-FS5 4K XAVC to MPEG-2 for Premiere Pro as primary delivery format.
To complete the task, Brorsoft Video Converter for Mac is highly recommended, which is a powerful 4K video converter, player and editor. If you are editing with Adobe Premiere, chances are you already installed this great free utility. If not, get it now.
With this professional 4K video converter, you can effortlessly encode Sony PXW-FS5 4K footage for smoothly importing and editing in various non-linear editing systems (NLEs), including Adobe Premiere Pro, Avid Media Composer, Final Cut Pro, iMovie, FCE and more. Besides, it also can deal with other video formats such as MKV, MTS, MXF, FLV .etc. If you are a PC user and willing to transfer Sony PXW-FS5 4K files to Premiere, Brorsoft Video Converter Windows version is your first choice.
Converting Sony PXW-FS5 4K footage for editing in Adobe Premiere
Step 1: Load files to the program
Click “Add” button on the top of the main interface to load original PXW-FS5 4K videos to the program. Or you can simply drag and drop the videos to the software.

Step 2: Choose Premiere Pro preferred format
Go to “Format” pull down list to select Adobe Premiere/Sony Vegas> MPEG-2(*.mpg) as the best video format for Premiere Pro. WMV, MOV formats in this column are the good choices as well.

Step 3: Adjust the video, audio settings
Click “Settings” to fix the frame rate, bitrate, video size, etc to your needs. To have a smooth editing with Adobe Premiere Pro, you need create the files with the appropriate resolution and frame rate that matches your source footage.
Step 4: Start conversion
Tap the Convert button to start transcoding Sony PXW-FS5 4K to MPEG-2 for Adobe Premiere Pro. Once the process completes, you can find the generated videos via “Open” button.
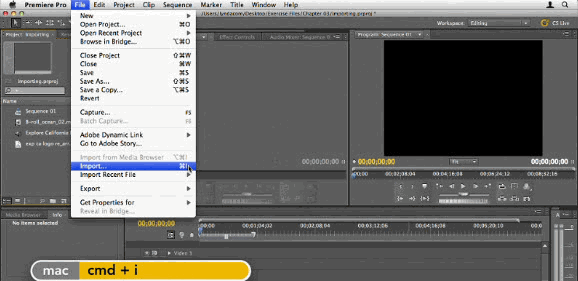
You’re now ready to get the result files into Adobe Premiere Pro to do further editing. Launch Premiere Pro on your Mac, choose “File > Import” to import any file. If you prefer to use keyboard shortcuts, press Command+I to open the standard Import dialog.
Editor’s Note: Premiere Pro CS6 will not natively support XAVC, but Adobe Premiere Pro CC, the latest version of Adobe Premiere Pro, has added support for this new camera format. To import XAVC to Adobe Premiere Pro CS6 and its previous versions, you can download Rovi Totalcode, a Plug-in for Adobe Premiere Pro CS5/CS5.5/CS6 which has perfect support for Sony’s 4K XAVC format. However, this third-party plug-in will cost you a lot of money. In addition, it only works on Windows but not Mac.
Very useful