Q1:” I recorded a MXF video when walking down the street, but there are so many noises were recorded also in the video, I’d like to disable audio. How to do this?”
Q2:“Not long ago I bought a Panasonic camcorder and recorded some P2 MXF clips for my customer, now I want to extract and replace the audio of the P2 MXF video files, can you recommend a program that can do this? Thanks!”
Q3:” I need to disable sound from my C300 II 4K MXF files and only keep video as an output format. How to do that? Tell me a simple way.”
To remove sound from video and keep the pure video, we need an audio remover. Here please take a free try on our MXF Converter for Mac (or Windows) software, this program will extract audio from MXF easily, you can also replace the original audio with your desired audio with the software’s powerful edit feature.

Follow the guide to Remove Audio Track from MXF Movies step-by-step.
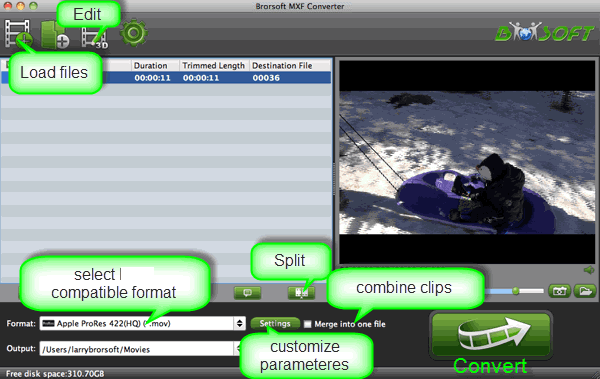
Step 1. Import MXF recordings
Download Brorsoft MXF Converter for Mac (or Windows) from the website, install and run this software.
 (Note: Click here for OS X 10.5)
After installing the MXF Converter for Mac, you can click the “Add File” button to import the source MXF videos to this program.

Tip: If you need to convert MXF with wanted subtitles and audio track, you can click the drop down menu after “Subtitles” and “Audio” to select your desired tracks. What’s more, it also offers an option called Forced subtitles, which enables you to see subtitles only when actors are speaking a different language.

Step 2. Choose output format
Select an compatible format, e.g. H.264 .mp4, since it is compatible with almost any devices and media players.
Basically the “Common Video -> H.264 Video (*.mp4)” is just all right.
